
How to Make a Staff Directory in WordPress (with Employee Profiles)
Do you want to create a staff directory on your WordPress site? An employee directory allows you to introduce customers to your team members and win trust by showing the human side of your business.
One downside of running an online business is that your customers don’t get to know you or your team members personally. A team directory helps bridge that gap.
In this article, we’ll show you how to easily add a staff directory in WordPress with individual employee profiles.

Creating a Staff Directory in WordPress (Step by Step)
First thing you need to do is install and activate Staff List plugin. It is a free WordPress team directory plugin. For detailed instructions, see our guide on how to install a WordPress plugin.
Next, you need to go to the Staff List » Admin page from your dashboard menu and click the ‘Quick Start’ tab. You will be asked to enter a name for your staff template and click the ‘Create Records’ button. For example, you can name it ‘New Staff Template.’
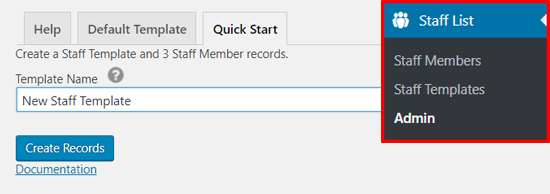
Once done, the plugin will create a staff template and add 3 staff members automatically.
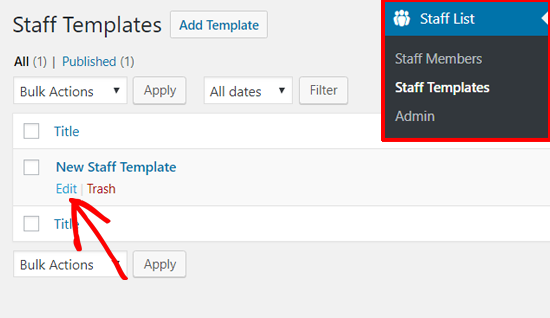
Next, go to Staff List » Staff Templates from your WordPress menu to preview your new staff template. You need to click on the ‘Edit’ link to configure the template.
You will see the Template Options including staff page layout, single page layout, field order, shortcodes, etc.
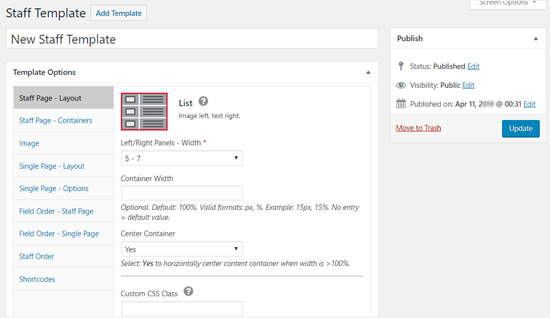
You can review the template options to make changes or simply leave the default options.
Below that, you can see the ‘Input Fields’ section to customize your staff profile.
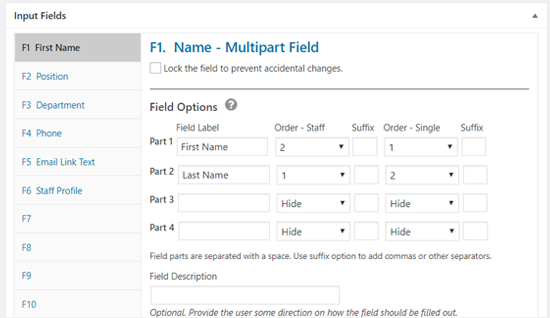
As you can see in the screenshot above, there are 6 input fields created by default.
- Name
- Position
- Department
- Phone
- Email Link Text
- Staff Profile
You can change the label, display options, and style for each field from the Field Options.
Add Staff Members to Make a Team Directory
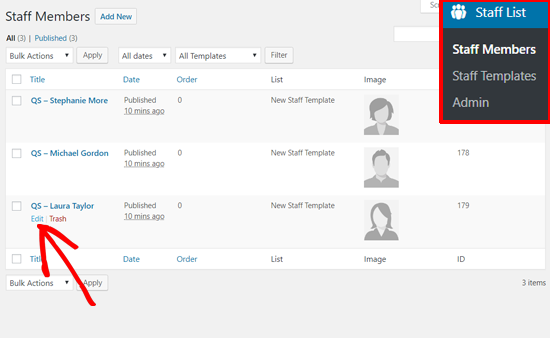
Now that you have customized your staff page template, you can add and customize your staff member profiles. Go to Staff List » Staff members, and you will see the 3 staff members already added by the plugin.
You can customize the default staff member profiles by changing the profile information. Click the ‘Edit’ link to get started.
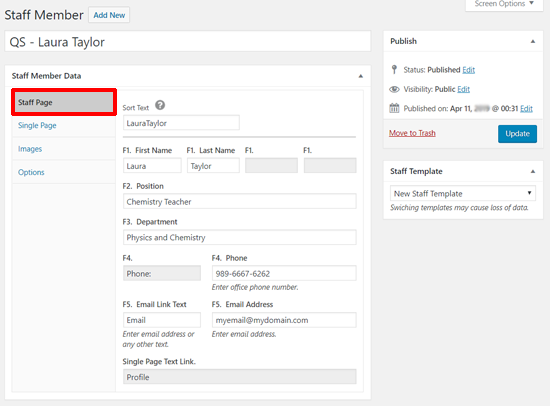
From here you can customize the Staff Member Data for team member listing page, individual profile page, and upload photos. The ‘Staff Page’ option shows you 6 input fields as shown in the staff page template above. The information you enter here will appear on your staff directory page.
Next, you can customize the ‘Single Page’ content. Like the Staff Page, it also has 6 input fields by default. However, it has a text field to write the individual employee profile bio.
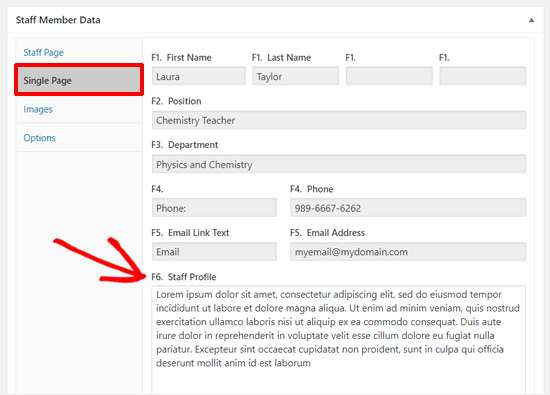
The information you enter here will appear on your individual employee profile page.
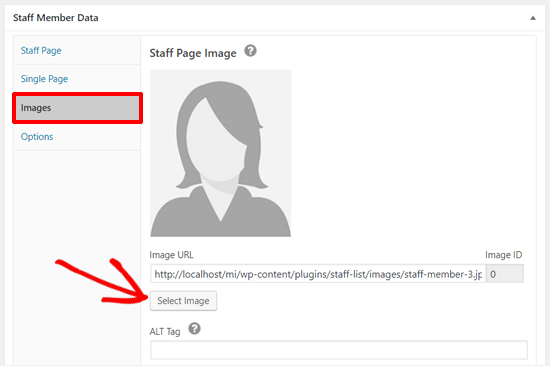
Next, you can add your team member images for the staff page and single page. You can quickly add your member’s profile photo by clicking on the ‘Select Image’ button.
Lastly, you can see the ‘Options’ tab which includes Single Page SEO options. You can add a URL slug and page title for your team member profile page.
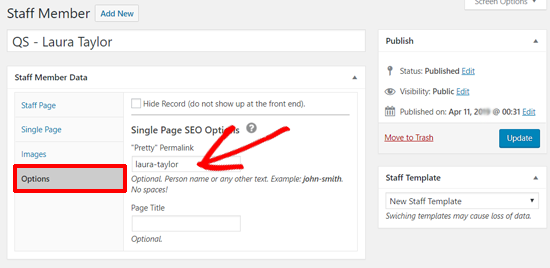
If you leave the “Pretty” Permalink option blank, then your staff profile page will have a URL like this: http://example.com/profile/?smid=528.
You can make it a pretty link by entering your staff member’s name with a dash in between. For example, you can use laura-taylor which would make your staff profile page URL: http://example.com/profile/laura-taylor.
Don’t forget to click on the ‘Update’ button to save your changes.
Repeat the same process to customize all team member profiles.
If you need to add more team members, you can click the ‘Add New’ button on the top.

First, add your staff member’s name. Then, choose your staff template from the right sidebar and click ‘Save Draft’ to load the input fields.
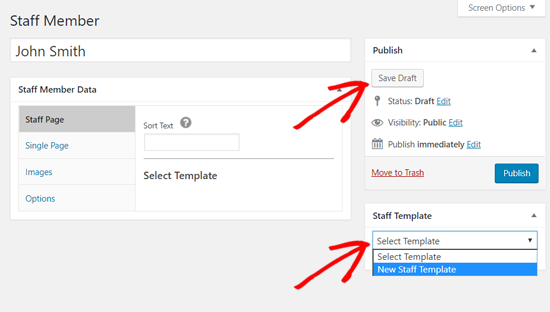
Next, you can see the same 6 input fields to create a team member profile. Add the necessary information as before.
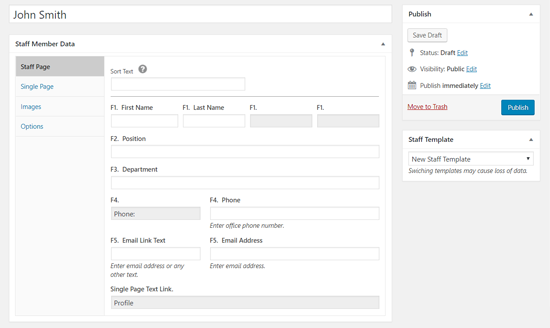
Once done, don’t forget to publish your staff member profile.
Publish Your Staff Member List in WordPress
Now that you have added all your staff member profiles, you are ready to publish your staff member list on your website.
First, you need to find and copy your staff page template’s shortcode. Go to Staff List » Staff Templates and click ‘Edit’ option below your staff page template. Then, the Template Options page will open.
Click on the ‘Shortcodes’ tab and copy the Staff Page Shortcode.
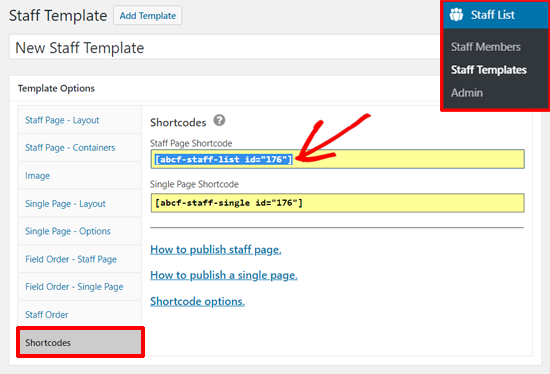
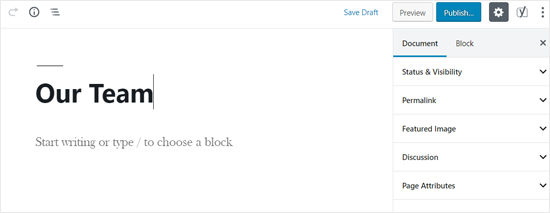
After that, you need to create a new page to display your staff member list. Go to Pages » Add New from your WordPress admin panel and enter a name for your staff list page. For example, you can name it ‘Our Team.’
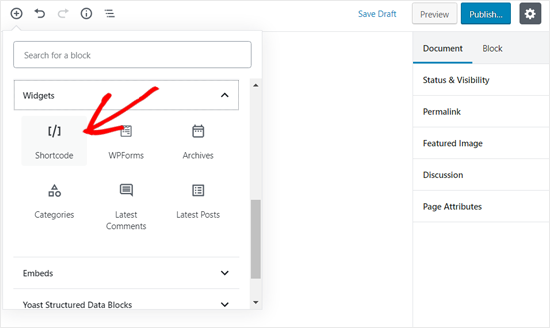
Then add the Shortcode block to your WordPress page editor area.
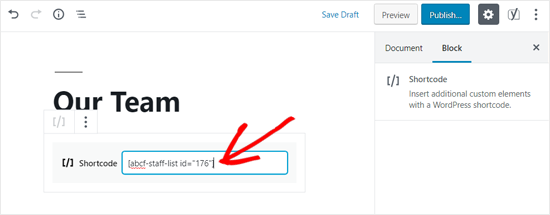
After the shortcode widget is added, paste the shortcode you copied earlier in the tutorial.
Then, you can ‘Publish’ the page.
Now you can open the page to see how your staff directory looks. Here is how it looks on the default Twenty Nineteen theme with the default staff member details.
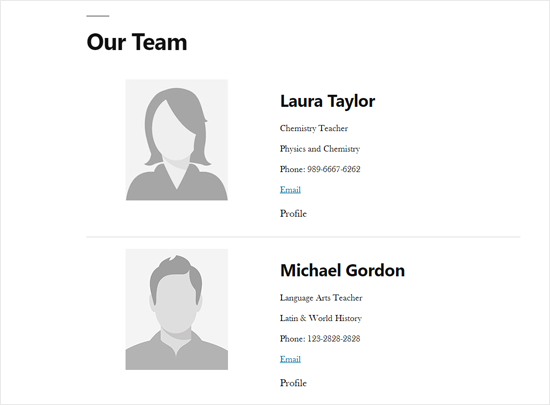
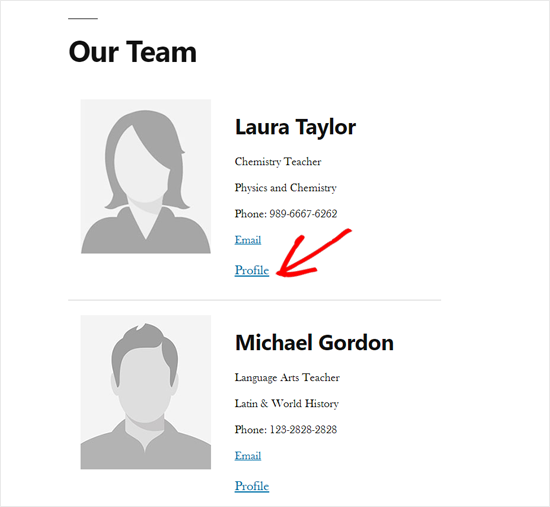
In the list, you can see the ‘Profile’ option which does not have a link. We will show you how to add the link in the next step.
Adding Individual Staff Member Profiles
So far we have created a simple team directory in WordPress that lists all staff members.
The next part is to create a single page for each team member to display individual employee profiles.
Let’s start by going to Staff List » Staff Templates and click ‘Edit’ option below your staff page template.
On the next page, you need to click on the ‘Single Page – Options’ tab and copy the Single Page Shortcode.
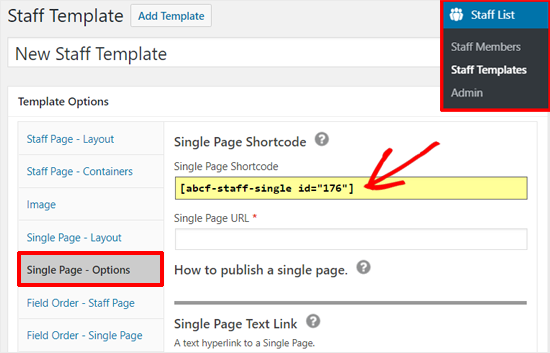
Now you need to create a new page in WordPress to add this shortcode. Go to Pages » Add New from your WordPress panel to add new a new page.
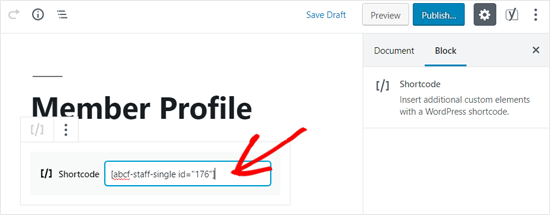
Enter your page title first — for example, Member Profile. Then, add the Shortcode widget to your WordPress page editor area and paste the Single Page Shortcode you copied before.
After that, you need to customize your page permalink. It’s important if you want the pretty links to work, then you need to make sure that you add one of these words as your page URL slug.
- bio
- profile
- profil
- perfil
Open the ‘Permalink’ option in the right sidebar and add one of these words as your page URL. For example, we will choose the ‘profile.’
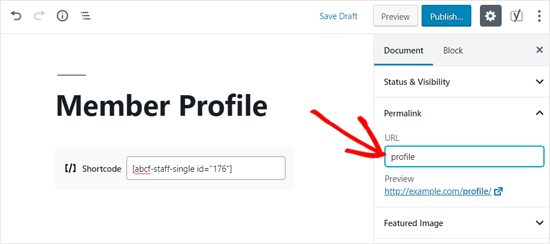
Once done, publish the page. Now you need to copy this page permalink and add to the Single Page Options.
You can do this by going back to Staff Template Options » Single Page – Options. Once there, simply paste the permalink in the Single Page URL field.
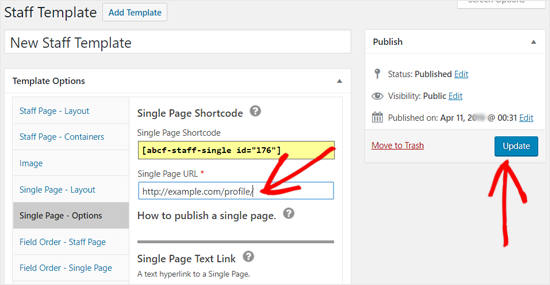
Once done, don’t forget to update your staff template.
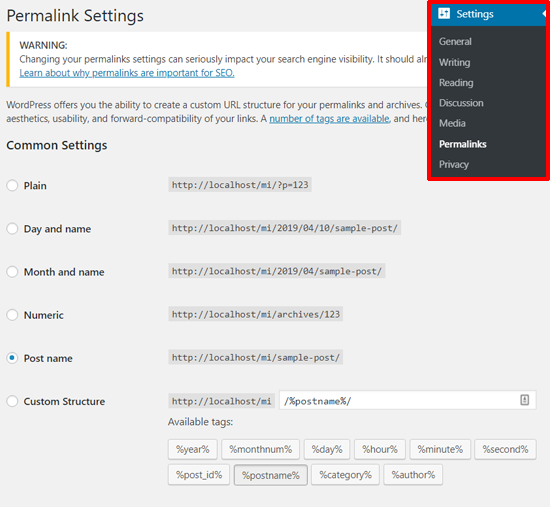
After that, you need to refresh your WordPress Permalink settings to make the pretty permalinks work. Go to Settings » Permalinks and simply click ‘Save Changes’ at the bottom without changing anything on this page.
Now you can open your staff member list page to see if the profile link is added or not. If it is working, then you will see the Profile text has a link.
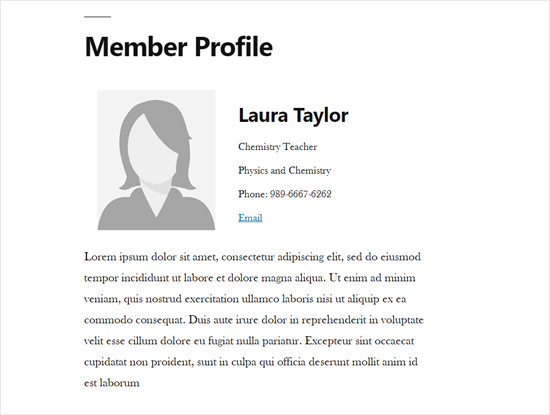
You can click the link, and it will open your team member’s profile page.
We hope this article helped you create a staff directory and add employee profile pages in WordPress. You may also want to see our guide on how to create your company org chart in WordPress.
If you liked this article, then please subscribe to our YouTube Channel for WordPress video tutorials. You can also find us on Twitter and Facebook.
The post How to Make a Staff Directory in WordPress (with Employee Profiles) appeared first on WPBeginner.
