
How to Easily Embed Instagram in WordPress (Step by Step)
Are you looking for an easy way to embed Instagram feeds on your WordPress website?
Embedding Instagram photos and videos on your website helps keep your content fresh, increases user engagement, and builds trust.
In this article, we will show you how to embed Instagram in WordPress, step-by-step.
Why Embed Instagram on Your WordPress Site
Showing content from your Instagram account on your WordPress website has a lot of benefits.
You can display product reviews, showcases, shoppable images, and other user-generated content in an Instagram feed as social proof to build trust and drive more sales.
It also helps improve the search engine optimization (SEO) of your site by keeping the content fresh and updated.
Aside from that, Instagram feeds are great for increasing engagement and keeping visitors on your website.
That said, let’s see how to embed an Instagram feed in WordPress.
How to Embed Instagram Feed with a WordPress Plugin
The easiest way of embedding Instagram feeds on WordPress is through a plugin.
For this tutorial, we will be using the free Smash Balloon Social Photo Feed. It is the best Instagram plugin for WordPress and allows you to display content from your Instagram account to your WordPress site in an instant.
There is also a paid version of the plugin called Smash Balloon Instagram Feed Pro. It offers more customization options like sort feeds based on hashtags, combine different feed types, show captions, likes and comments, and much more.
First, you need to install and activate the Smash Balloon Social Photo Feed plugin on your website. For more details, see our step-by-step guide on how to install a WordPress plugin.
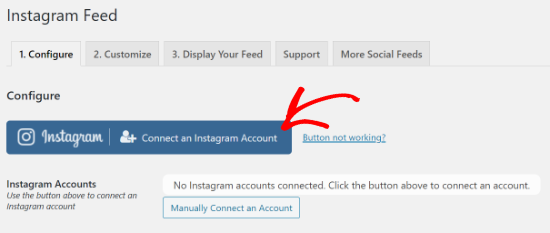
After activating the plugin, you need to visit Instagram Feed » Settings and click the ‘Connect an Instagram Account’ button under the ‘Configure’ tab.
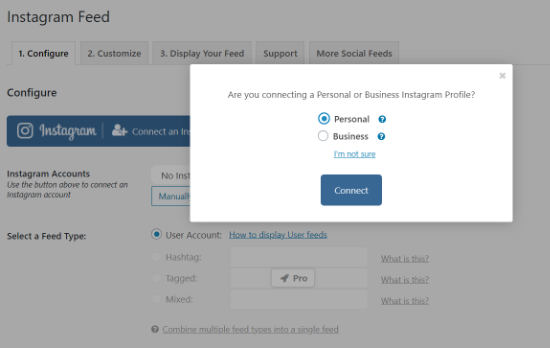
You will see a popup where you can choose between a Personal or Business Instagram profile. For this tutorial, we will select the Personal option and click the ‘Connect’ button.
On the other hand, if you have a Business or Creator Instagram account, then you can select the ‘Business’ option to continue.
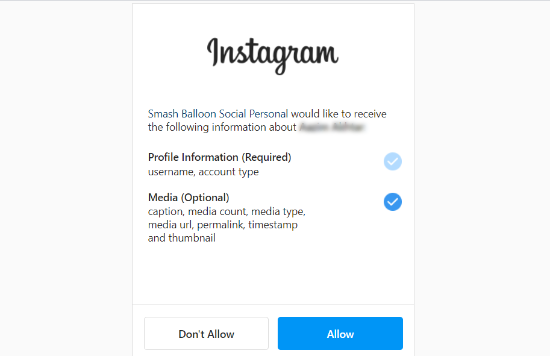
After that, you will have to log in to your Instagram account and click the ‘Allow’ button to let Smash Balloon access your profile information and media content.
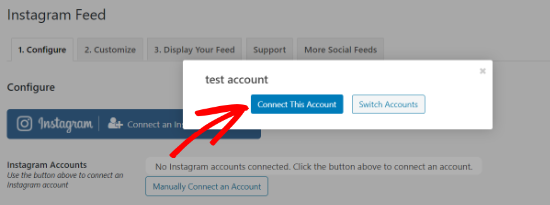
You’ll now be redirected back to your website, where you’ll see a popup with your Instagram ID asking you to connect your account. To do that, click the ‘Connect This Account’ button.
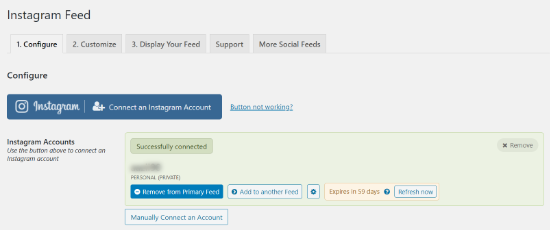
Next, you should see your Instagram account connected to Smash Balloon.
After that, go to the ‘Customize’ tab and change the look and feel of your Instagram feed. For example, customize the width and height of the feed, and change the background color.
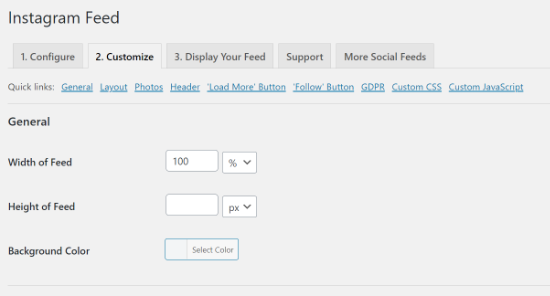
Other than that, Smash Balloon lets you choose the number of photos and columns to display in the feed. You can also select the padding around images, disable mobile layout, sort your images, and select image resolution.
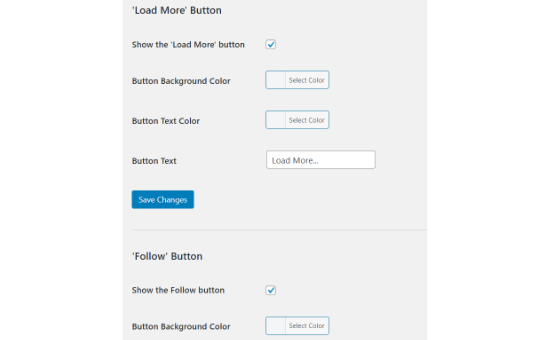
If you scroll down, there are more options for customization. For instance, edit the header of your Instagram feed, enable the ‘Load More’ and ‘Follow’ buttons, change GDPR settings, and get a weekly feed issue report.
However, if you upgrade to the Pro version, there are additional customization features, like selecting a layout type, enabling caption, like and comments, post-filtering, and moderation.
After you are done editing the Instagram feed, click the ‘Save Changes’ button.
Next, Smash Balloon Social Photo Feed makes it very easy to embed Instagram anywhere on your WordPress blog.
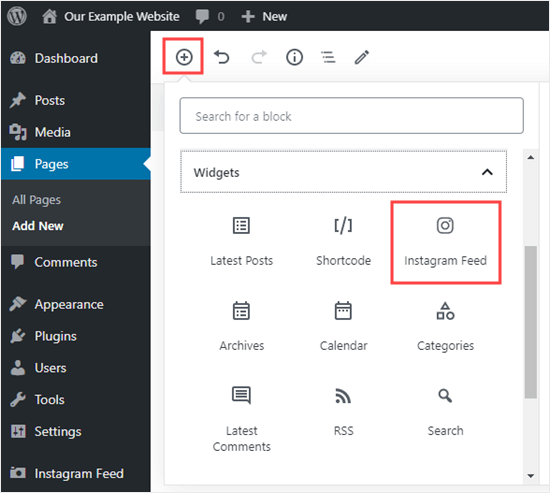
To do that, edit or add a new post/page. In the WordPress editor, click the plus sign (+) to add a new block and search for ‘Instagram Feed.’
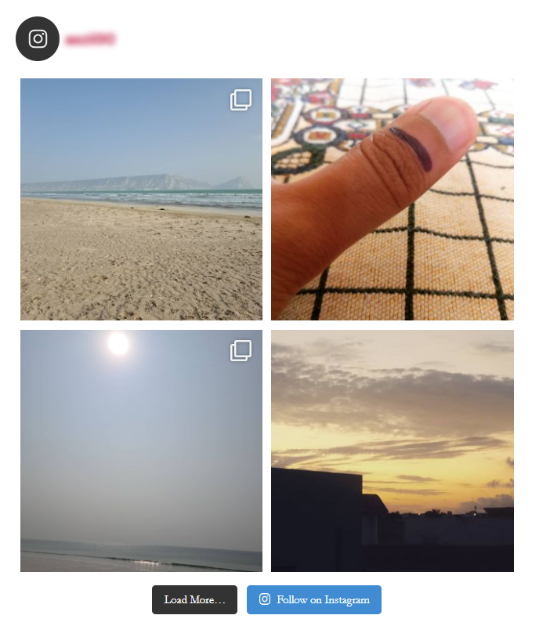
Smash Balloon will automatically load the Instagram feed and show you a preview in the content editor. You can now publish your post or page to display content from Instagram.
If you are using the classic editor, then you’ll need to use the shortcode [instagram-feed] where you want to display your Instagram feed.
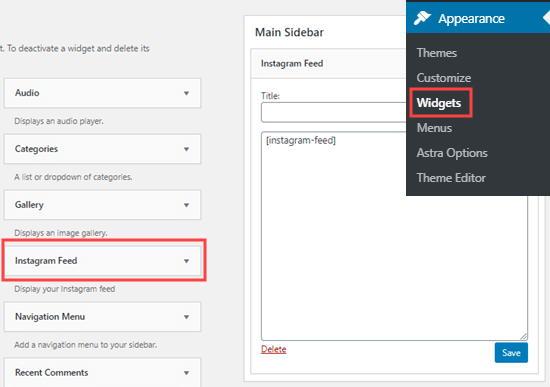
Smash Balloon Social Photo Feed plugin also makes it very easy to add the feed in the sidebar. To do that, go to Appearance » Widgets, drag the Instagram Feed widget to your sidebar, and click the ‘Save’ button.
How to Add Instagram Feed Using Default Embed Blocks
If you are looking to embed an Instagram feed in your content using the default embed feature, then you’ll need to enable Instagram oEmbeds in the Smash Balloon Social Photo Feed plugin.
This is because you cannot directly embed content from Instagram or Facebook to your WordPress website anymore.
The feature was deprecated in October 2020 by WordPress, when Facebook required developers to register an app and use Access Tokens to get the data from their API for oEmbed content.
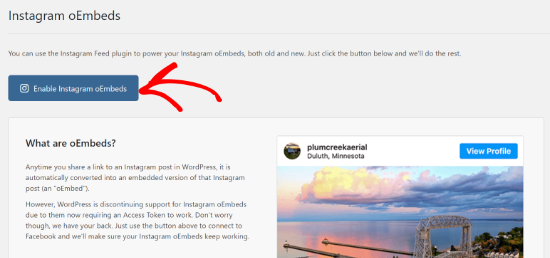
A simple solution to fix the oEmbed issue is by using the Smash Balloon Social Photo Feed plugin. Just go to Instagram Feed » oEmbeds from your WordPress admin area.
After that, click the ‘Enable Instagram oEmbeds’ button.
You will now see a popup where the plugin will ask you to ‘Connect to Facebook.’
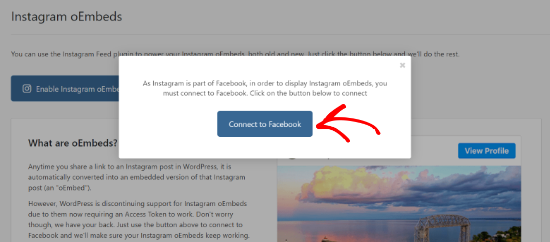
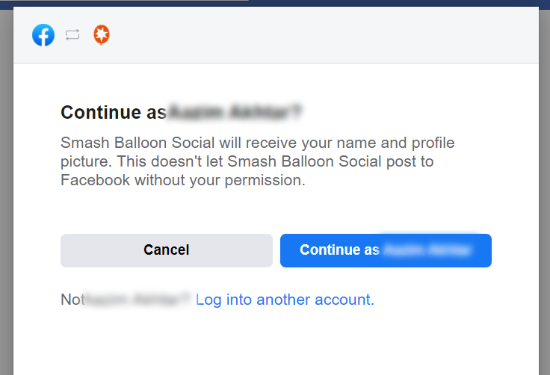
Next, log in to your Facebook account and connect it with Smash Balloon.
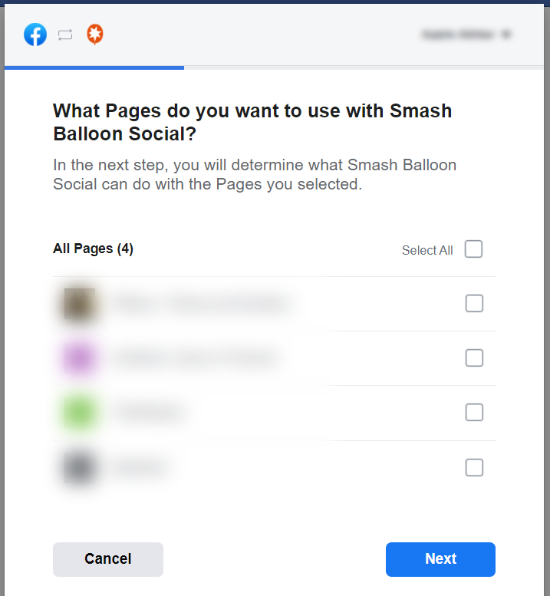
After that, you can select Facebook pages that you want to use with Smash Balloon and click the ‘Next’ button.
An advantage of allowing Smash Balloon to use your pages is that your Access Tokens do not expire. You can skip this part, but your Access Token will only be valid for 60 days.
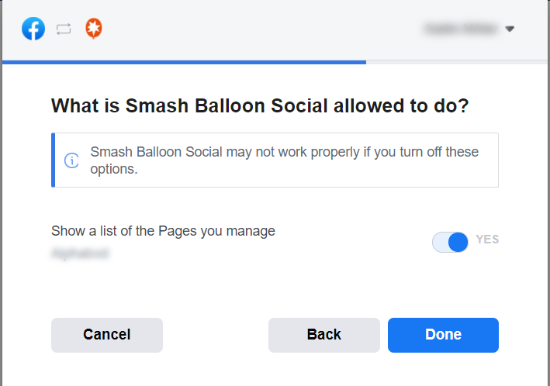
Next, you need to select what Smash Balloon can do with your Facebook page and click the ‘Done’ button. For example, you can allow the plugin to show a list of pages you manage.
After that, you should see a message saying you’ve now linked Smash Balloon social to Facebook. Now click the ‘Ok’ button to return to your WordPress admin area.

You will see a message saying that Instagram Feed will replace your old oEmbeds automatically and generate all new content for all new links.

Now, you can easily embed any Instagram content in your blog post or page.
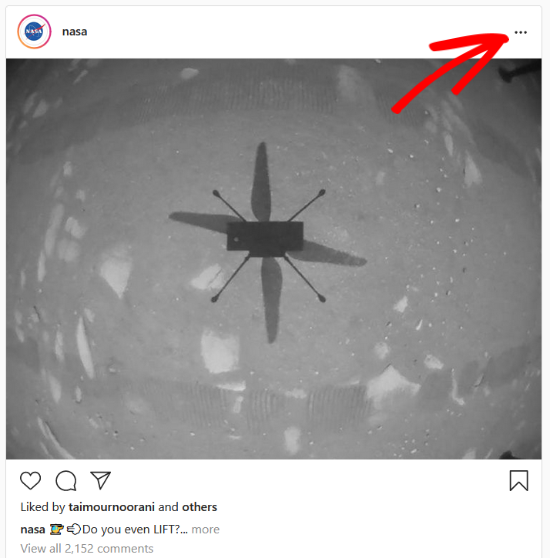
Just go to your Instagram account and click the three dots (…) in the right top corner of any Instagram picture or video to open more options.
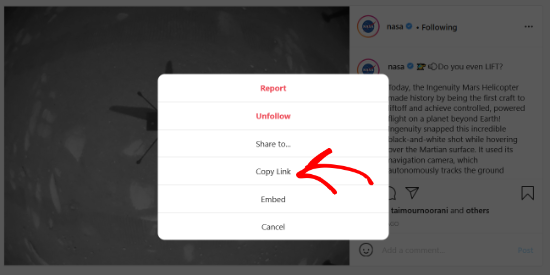
Next, click the ‘Copy Link’ button when more options appear in the popup.
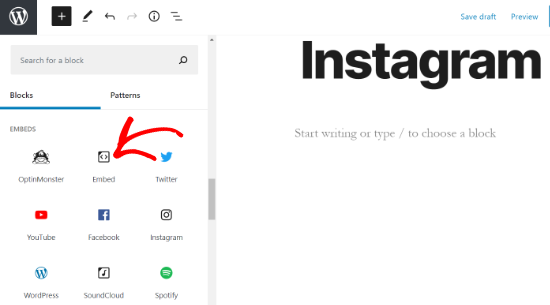
After that, edit any post or page and click the plus (+) sign to the top left corner to add an ‘Embed’ block.
Now enter the URL of your Instagram content and click the ‘Embed’ button.
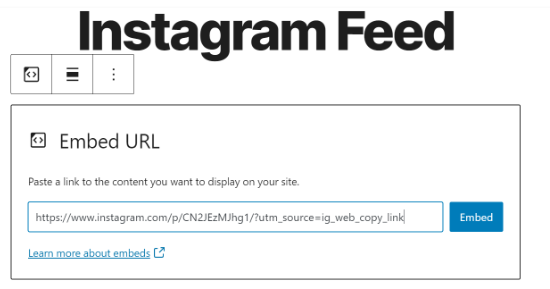
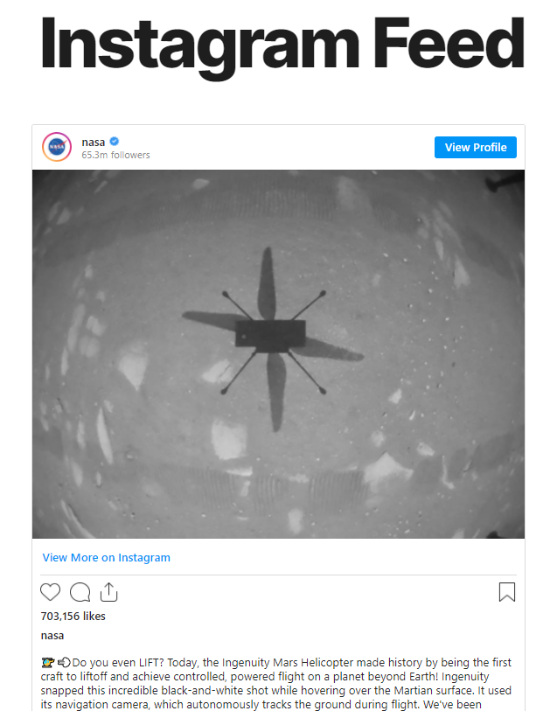
Once that is done, you can publish your post or page to see the Instagram feed on your website.
We hope this article helped you learn how to embed Instagram to your WordPress website. You might also want to go through our guide on how to choose the best website builder and proven ways to make money online blogging with WordPress.
If you liked this article, then please subscribe to our YouTube Channel for WordPress video tutorials. You can also find us on Twitter and Facebook.
The post How to Easily Embed Instagram in WordPress (Step by Step) appeared first on WPBeginner.
